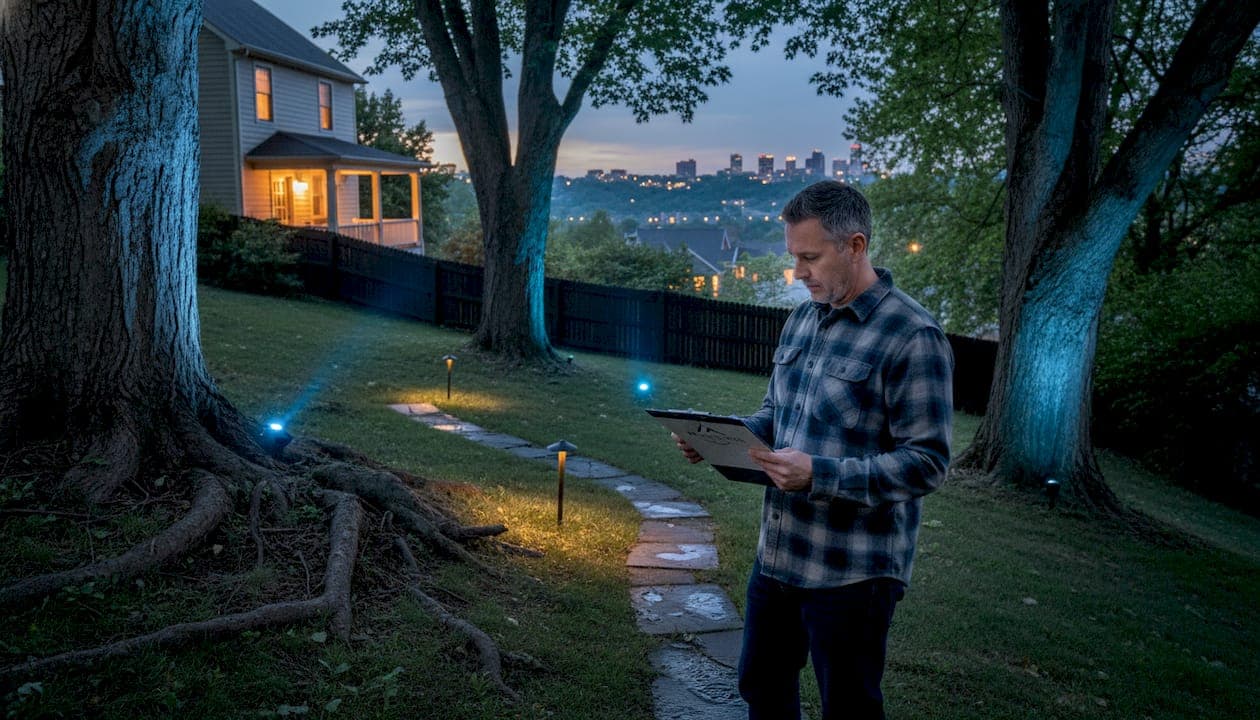
Poorly lit outdoor spaces do more than just look uninviting — they create real safety hazards and drain your home's curb appeal every single evening. If you've ever walked up a dark path, squinted at an unlit house number, or felt like your yard lighting was just "thrown together," you're not alone. Most Pittsburgh homeowners end up with a mix of mismatched fixtures and no clear plan to tie it all together. This guide walks you through every step of building a custom lighting layout that genuinely works for your property, your neighborhood, and Pittsburgh's unpredictable weather.
Table of Contents
- Gathering materials and planning your layout
- Mapping your outdoor space
- Drafting your lighting layout: step-by-step
- Testing, troubleshooting, and common mistakes
- A fresh perspective on outdoor lighting layouts
- Unlock expert lighting solutions for your Pittsburgh home
- Frequently asked questions
Key Takeaways
| Point | Details |
|---|---|
| Plan for safety | A well-designed layout keeps paths and entrances visible at night. |
| Visualize before installing | Sketch layouts or use apps to test ideas before committing to hardware. |
| Test at night | Night-time checks help spot problem areas that daylight planning can miss. |
| Avoid over-lighting | Strategic placement ensures features are highlighted without harsh glare. |
| Adapt to Pittsburgh weather | Regular reviews keep lighting layouts working through local conditions. |
Gathering materials and planning your layout
Before you place a single fixture, you need the right tools in hand. Starting without a plan leads to wasted money, extra holes in the ground, and lighting that still doesn't quite look right.
Here's what you'll need to gather before you begin:
- Graph paper or a large blank notepad for sketching your yard
- A measuring tape (at least 25 feet) to capture accurate distances
- Colored markers to distinguish zones like pathways, garden beds, and architectural features
- A flashlight or headlamp for testing during evening walkthroughs
- Lighting fixtures you're considering, so you can hold them in place and visualize scale
- A smartphone or tablet to use digital planning apps
For digital planning, DIY homeowners can use free apps and templates like ArcSite for layout work before purchasing a single bulb. These tools let you drop fixture icons onto a scaled yard map, which saves a lot of trial and error. Pros consistently recommend testing placements at night before finalizing anything, and good apps make that phase much easier.
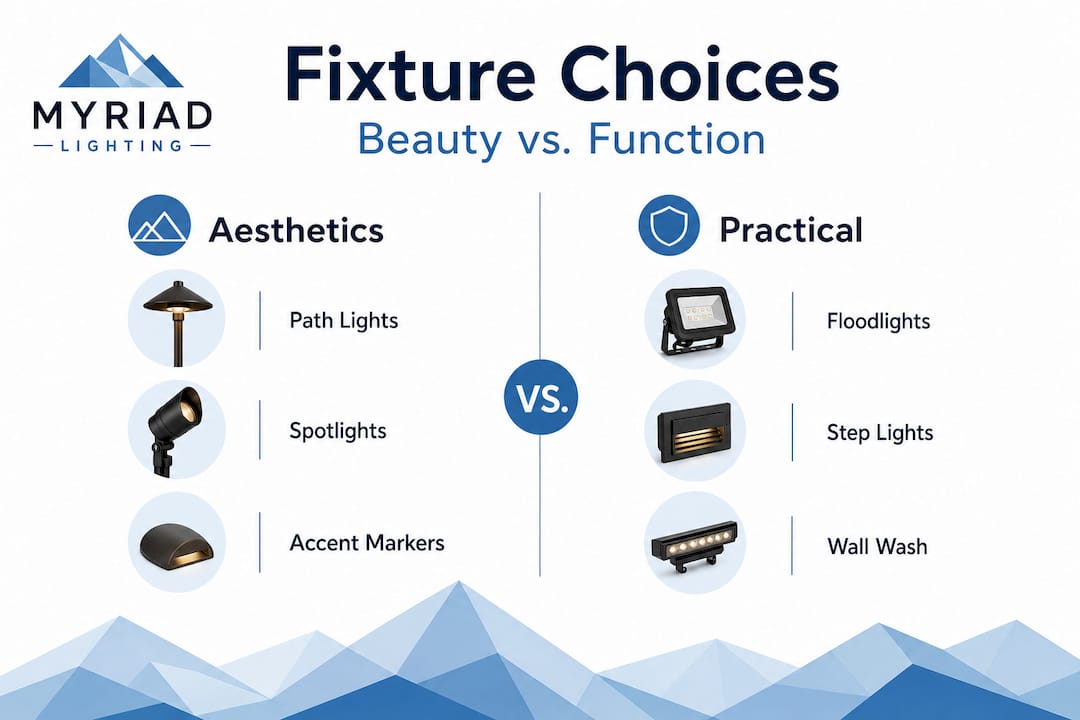
When you're choosing what to buy, think beyond just "bright enough." The type of fixture matters for both beauty and function. This table breaks down the difference between a basic and advanced materials setup:
| Category | Basic setup | Advanced setup |
|---|---|---|
| Planning tool | Paper sketch | App-based digital layout (e.g., ArcSite) |
| Fixtures | Standard stake lights | Directional spotlights, adjustable wash lights |
| Power source | Extension cord or plug-in | Hardwired low-voltage transformer |
| Wiring management | Surface-laid wire | Buried conduit with hidden connections |
| Timer/control | Manual on/off | Smart timer or app-controlled dimmer |
| Weather rating | Basic outdoor rating | IP65 or higher waterproof rating |
Investing in better materials upfront pays off, especially in Pittsburgh where frost heaving (when soil freezes and shifts) can displace shallow fixtures. When you're selecting lighting fixtures for the first time, look for weather-resistant ratings and adjustable mounting options that survive freeze-thaw cycles.
Also, before you head to the store, read up on a solid pathway lighting guide so you understand beam angles, spacing recommendations, and lumen counts suited for walkways specifically.
Mapping your outdoor space
With your materials ready, the next step is creating an accurate map of your yard. This is where most DIYers skip ahead and regret it later. A good map reveals how your space actually flows, where obstacles sit, and which areas genuinely need light.
Follow these steps to map your outdoor space effectively:
- Walk the entire perimeter of your yard and note every fixed feature: trees, garden beds, fences, utility boxes, and hardscaping like patios or retaining walls.
- Measure key distances: from the house to the sidewalk, the width of your driveway, the length of any walkways, and the distance between major focal points like a large tree or entry door.
- Sketch the footprint of your home onto your paper or digital canvas, keeping it roughly to scale.
- Label zones: mark areas by their purpose, such as "entry path," "seating area," "garage approach," "garden feature," and "fence line."
- Mark obstacles: note anything that could block light, interfere with wiring, or complicate fixture placement, including overhead power lines and underground utilities.
- Note existing light sources: street lights, neighboring porch lights, and garage floods all affect how much additional lighting you actually need.
Pittsburgh yards often come with unique challenges. Many neighborhoods feature steep slopes, mature trees with large root systems, and older homes with limited exterior electrical access. Properties in areas like Mt. Washington or Squirrel Hill frequently have terraced landscapes where light needs to reach multiple elevations. Factor those vertical changes into your map, not just the horizontal footprint.

Here's a quick comparison of mapping methods to help you choose the right approach:
| Feature | Manual sketch | App or online tool |
|---|---|---|
| Cost | Free | Free to low cost |
| Accuracy | Depends on skill | Higher with GPS tools |
| Ease of editing | Requires redrawing | Easy drag-and-drop |
| Sharing with pros | Harder to communicate | Easy to share digitally |
| Learning curve | None | Minimal |
| Best for | Simple yards | Complex or large properties |
Strong landscape lighting planning always starts with a detailed map. Once you've finished yours, you'll be surprised how clearly you can see where the light needs to go. Review some additional lighting design tips to inform your zoning decisions before moving on.
Drafting your lighting layout: step-by-step
Now that your map exists, it's time to place fixtures on paper (or on screen) and draft the full plan. This is the creative phase, but it's grounded in practical decisions about safety and visual impact.
Work through these steps in order:
- Identify your focal points. What do you most want people to notice? This could be your front door, a mature oak tree, a stone garden wall, or architectural details on your home's facade. Circle these on your map.
- Plan safety-critical zones first. Mark every spot where someone needs light to navigate safely: front steps, the main walkway, driveway edges, and side gates. These are non-negotiable.
- Assign fixture types to zones. Spotlights work for trees and architectural features. Path lights belong along walkways. Wash lights spread soft illumination along fences or garden beds. Floodlights cover broad areas like driveways.
- Map out wiring runs. Sketch lines from each fixture back to a central transformer or power source. Keep runs as short and direct as possible while avoiding tree roots and hardscaping.
- Check for dark gaps. Stand back and look at your draft. Are there areas between fixtures that would create pools of darkness? Adjust spacing until coverage feels continuous without being harsh.
- Mark wattage and lumen estimates. This helps you size your transformer correctly and avoid overloading a single circuit.
When you're ready to actually execute the plan, review these lighting installation steps to understand how installations go from draft to finished product. You'll also find value in exploring task lighting ideas for areas where you need both function and style, such as an outdoor kitchen or grill station.
Pro Tip: Before you drive a single stake into the ground, take your fixture list outside at night and physically hold each light in its proposed position. Have someone else watch from the street. What looks balanced on paper often needs adjustment once you see it against your actual landscaping in the dark.
Balancing aesthetics with safety is the heart of a great layout. Beauty without safety creates liability. Safety without beauty creates a yard that looks like a parking lot. The best layouts layer light: a base level of safe, even illumination across walkways and entries, plus accent layers that highlight architecture and landscape features above and around that base.
Testing, troubleshooting, and common mistakes
Before you call the layout final, you need to verify it in real conditions. Testing after dark reveals problems that no amount of daytime planning can anticipate.
Use this checklist when verifying your layout at night:
- Walk every path and confirm you can see where you're stepping without straining
- Check for harsh glare: no fixture should shine directly into eye level from any common approach angle
- Look for dark gaps between fixtures along walkways and at transitions between zones
- Assess shadows: uplighting on trees can cast dramatic shadows, which can be beautiful or unsettling depending on placement
- Verify entry areas: front door, side gates, and garage entries should all be clearly identifiable from the street
- Check neighbor impact: confirm your light doesn't spill into a neighbor's windows or create nuisance glare
Pros recommend testing at night precisely because the human eye perceives brightness and shadow so differently in darkness than in daylight. A fixture that seems modest during installation can become blinding at 9 p.m.
Common mistakes homeowners make when setting up outdoor layouts include:
- Over-lighting: more fixtures don't mean better results. Too much light flattens visual depth and creates an institutional, unflattering look.
- Inconsistent fixture heights: mixing tall bollard lights with very low stake lights creates a disjointed appearance that reads as unplanned.
- Ignoring walkways in favor of aesthetics: always light the path before you light the garden bed beside it.
- Skipping transformer sizing: a transformer that's too small causes lights to dim unevenly, especially as you add fixtures over time.
- Placing fixtures too close to sprinkler heads: seasonal watering patterns can shift spray and damage fixtures not designed for direct water contact.
Read more about lighting mistakes to avoid before you finalize anything, and study lighting best practices for a Pittsburgh-specific perspective on what works in this climate long-term.
Pro Tip: Don't adjust everything at once. Change one fixture position, retest, and then move to the next. Small, deliberate changes let you isolate what's actually improving the result rather than creating new problems while fixing old ones.
Before you install permanently: always check Pittsburgh's local permit requirements for hardwired outdoor electrical work, and call 811 to have underground utilities marked before digging any trench for wiring.
A fresh perspective on outdoor lighting layouts
Most lighting guides treat every yard the same. Pittsburgh yards are not the same.
Our team has installed outdoor lighting across the city, from the flat lawns of the South Hills to the steep, terraced gardens of the North Shore. What we've learned is that Pittsburgh's terrain and climate genuinely change what works. Slopes affect how light falls and reflects. Dense tree coverage in neighborhoods like Shadyside creates layered canopies that swallow upward-aimed spotlights if the beam angle isn't adjusted correctly. And the freeze-thaw cycles here are relentless. A fixture that's perfectly level in October can be tilted 15 degrees by March.
The textbook approach to outdoor lighting layout is accurate but incomplete. No planning app captures the way evening fog rolls through Pittsburgh in November and softens light in unexpected ways. No grid sketch tells you that your neighbor's tall privacy hedge will block your path light's glow from the street. These are things you discover only by being outside at night, in the actual conditions, watching how light behaves.
We also see homeowners dramatically underestimate the value of seasonal rechecks. After a major rain or a heavy snowfall, expert outdoor lighting professionals always walk properties to reset shifted fixtures, clear debris from fixture lenses, and verify nothing has been damaged by ground movement. Building that habit into your twice-yearly routine extends fixture life considerably and keeps your layout performing as designed.
The deepest insight we can offer: a lighting layout is never truly finished. It evolves as your landscaping matures, as you add garden features, and as the seasons change what your yard looks like after dark. Build flexibility into your plan from the start. Choose fixtures with adjustable heads. Leave capacity on your transformer. And never stop testing at night.
Unlock expert lighting solutions for your Pittsburgh home
Planning a custom outdoor lighting layout takes real effort, and getting every detail right matters for both safety and how your home looks from the street.

At Myriad Lighting, we design and install custom outdoor lighting systems built specifically for Pittsburgh properties, accounting for slope, climate, architecture, and your personal style. From beautiful landscape lighting services that transform your yard into a nighttime showpiece, to professionally installed holiday lighting that makes your home stand out every season, our team handles every detail. We keep wiring hidden, minimize disruption to your landscaping, and walk you through every fixture placement before we finalize anything. Reach out today to schedule a consultation and see what a truly custom layout looks like.
Frequently asked questions
What materials should I prepare before planning a lighting layout?
Start with a yard map, markers, measuring tape, and consider using free apps like ArcSite for digital sketches before purchasing fixtures. Having these ready before you begin saves time and prevents costly miscalculations.
How do I test my lighting layout to ensure safety and aesthetics?
Walk every path and entry point at night, check for glare and dark gaps, and adjust fixture positions before making anything permanent. Testing at night is the single most reliable way to confirm your layout actually works in real conditions.
What are some common mistakes homeowners make when designing lighting layouts?
Over-lighting, mismatched fixture heights, and skipping pathway illumination in favor of accent features are the most frequent errors. Always test your layout after dark to catch problems that aren't visible during daytime planning.
Can weather in Pittsburgh affect my outdoor lighting layout?
Absolutely. Pittsburgh's rain, snow, and freeze-thaw cycles can shift fixture positions, damage low-rated equipment, and change how light reflects off wet or snow-covered surfaces. Pros recommend using weather-resistant fixtures and checking your layout after major weather events each season.