
A dark walkway is more than an eyesore. It's a tripping hazard waiting to happen, especially during Pittsburgh's icy winters and rainy springs. Many homeowners want to fix this but feel stuck before they even start, unsure about transformers, wire gauges, or where to place the first fixture. This guide walks you through every stage of pathway lighting installation, from gathering materials to testing your finished system. You'll come away with the knowledge to create a walkway that's safer, more welcoming, and built to handle whatever Pittsburgh weather throws at it.
Table of Contents
- What you need before you start
- Step-by-step pathway lighting installation
- Placement and fixture selection tips
- Troubleshooting and common mistakes to avoid
- A professional perspective: What we've learned from Pittsburgh installs
- Bring your pathway vision to life with local expertise
- Frequently asked questions
Key Takeaways
| Point | Details |
|---|---|
| Pre-plan for success | Careful planning and proper materials prevent costly installation mistakes. |
| Use the right transformer | Choosing the correct transformer and wire size ensures safe, reliable pathway lighting. |
| Test before you bury | Always test your lighting system before burying wires to avoid hidden errors. |
| Avoid solar pathway pitfalls | Low-voltage wiring is more dependable for Pittsburgh’s cloudy climate than solar lights. |
What you need before you start
Before you dig a single hole or uncoil a single wire, preparation makes the difference between a smooth install and a frustrating redo. Think of this phase like drawing up a blueprint. The clearer your plan, the fewer surprises you'll face.
Start by sketching your walkway on paper. Mark where each fixture will go, measure the total run length, and count your fixtures. This sketch becomes your shopping list and your wiring map.
Here's what you'll need to gather:
- Low-voltage pathway fixtures (choose weatherproof, rated for outdoor use)
- Low-voltage transformer with timer or photocell
- Direct burial landscape wire (12 or 14 gauge)
- Wire connectors (waterproof snap connectors work best)
- Rubber mallet for driving stakes
- Wire stripper and cutters
- GFCI outlet nearby or access to one
- Safety gloves and eye protection
Transformer sizing is where many DIYers go wrong. Add up the wattage of every fixture you plan to install, then apply a 1.25 buffer multiplier. So if your fixtures total 80 watts, you need a transformer rated for at least 100 watts. Per low-voltage installation guidance, you should use 12 to 14 gauge wire and mount the transformer near a GFCI outlet, elevated off the ground to avoid moisture contact.
| Component | Recommended spec | Why it matters |
|---|---|---|
| Transformer | Total watts x 1.25 | Prevents overload and flickering |
| Wire gauge | 12 or 14 AWG | Controls voltage drop |
| Fixture type | Weatherproof, IP65+ | Handles Pittsburgh rain and freeze |
| Outlet | GFCI protected | Required for safety and code |
Before you buy anything, check Pittsburgh's local code requirements. Some municipalities require permits for electrical work, even low-voltage systems. A quick call to your local building department saves you from having to redo work later.
If you want to see how professional lighting design features differ from a basic DIY setup, it's worth reviewing what licensed designers prioritize, especially around fixture quality and system longevity.
Step-by-step pathway lighting installation
Now that you're prepared, let's break down each installation step to guide you from planning to first light-up.
- Mark fixture positions. Walk your pathway at night with a flashlight. Place temporary markers (flags or stakes) where pools of light should overlap. Aim for 6 to 8 feet between fixtures as a starting point.
- Lay out the wire. Run your wire along the path without burying it yet. Leave extra length at both ends. This is your dry run.
- Connect fixtures to the wire. Use waterproof snap connectors. Pierce the wire insulation and clamp each connector firmly. Check that no bare copper is exposed.
- Mount the transformer. Attach it to a wall or post near your GFCI outlet, at least 12 inches above ground level. Connect the wire leads to the transformer terminals.
- Test the system before burial. Plug in the transformer and turn it on. Walk the path and confirm every fixture lights up at full brightness.
- Bury the wire. Use a flat spade to create a narrow trench 3 to 6 inches deep. Lay the wire and close the trench. Avoid sharp bends.
- Set the timer or photocell. Program your transformer to turn lights on at dusk and off at a set time, usually 4 to 6 hours later.
Pro Tip: Run a second wire pass before burial to double-check connector placement. It takes five extra minutes and can save you hours of digging later.
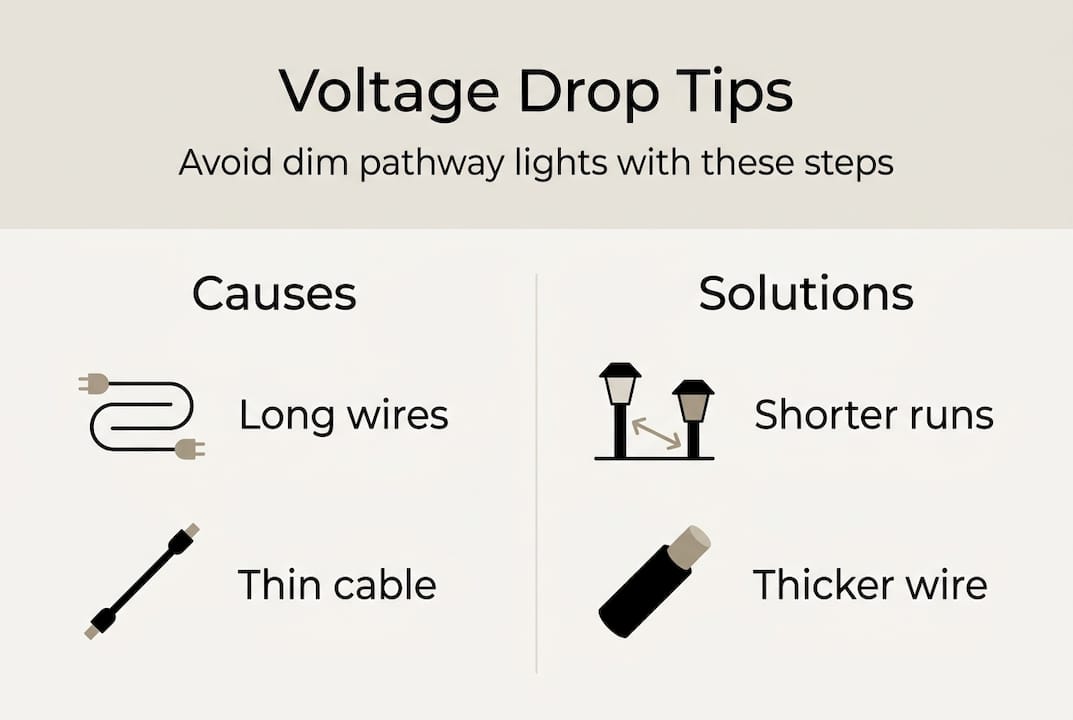
One issue that catches homeowners off guard is voltage drop. Dim far-end lights are a classic sign of this problem, typically caused by runs longer than 100 feet on 14 AWG wire, thin wire, or an overloaded transformer. The fix is straightforward: upgrade to 12 AWG wire, switch to hub wiring (running separate wire runs from the transformer to groups of fixtures), or use a multi-tap transformer that lets you adjust voltage output.
| Wiring method | Best for | Voltage consistency |
|---|---|---|
| Daisy chain | Short runs under 100 ft | Moderate, drops at far end |
| Hub (home run) | Long runs or many fixtures | Excellent, even across all lights |
For a deeper look at what goes into a full landscape lighting installation, including design and buried wiring, the process shares many of the same principles covered here. You might also explore motion-activated lighting options to add another layer of security alongside your pathway system.
Placement and fixture selection tips
With your pathway system wired and working, fine-tuning placement and fixture style creates the inviting and safe effect you're after.
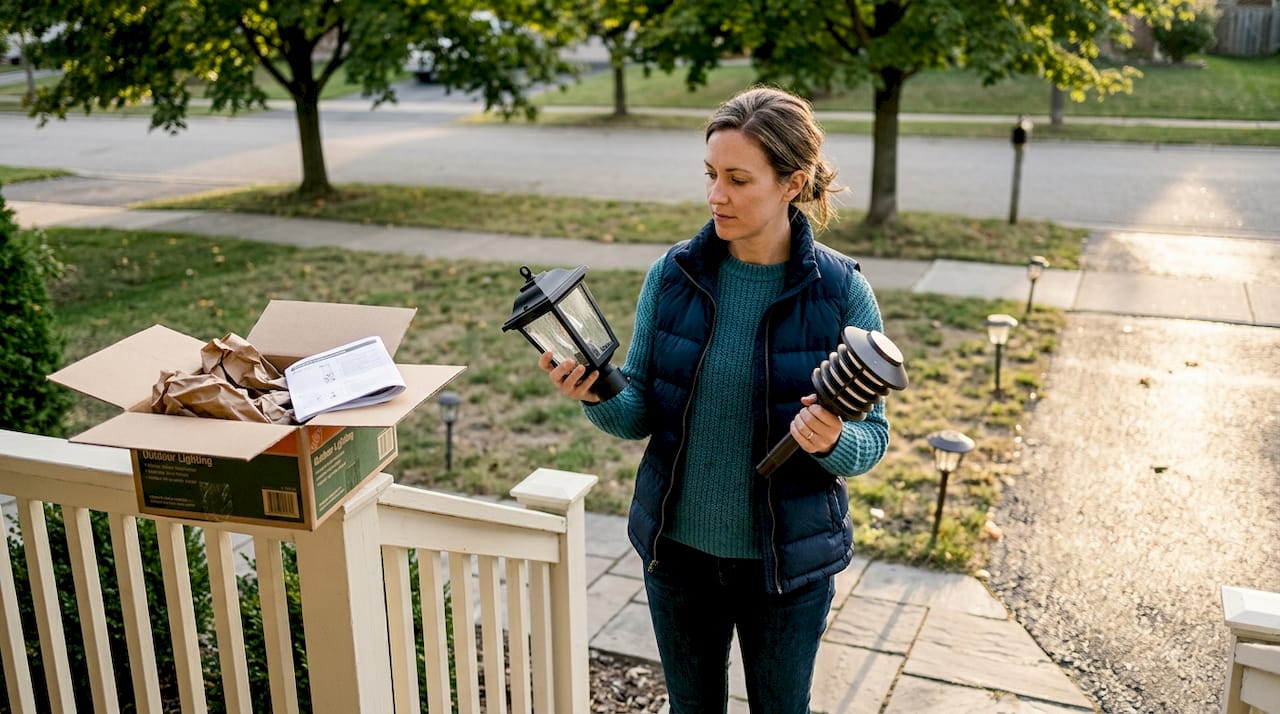
Fixture selection matters more than most homeowners expect. Pittsburgh's climate includes freeze-thaw cycles, heavy rain, and humid summers. Fixtures need to be rated IP65 or higher, made from brass, copper, or quality cast aluminum. Plastic fixtures crack under repeated freezing and look dated within a couple of seasons.
Here are the most important placement principles to follow:
- Alternate sides of the path rather than placing fixtures directly across from each other. This creates a more natural, layered look.
- Avoid pointing fixtures straight up. Angle them slightly toward the walking surface to reduce glare.
- Keep fixtures out of lawn mower paths. Damage from mowers is one of the top causes of fixture replacement.
- Don't over-light. More fixtures don't mean better results. Overlighting washes out the effect and creates harsh glare rather than a welcoming glow.
- Test spacing before committing. Place fixtures temporarily and view from the street at night before finalizing positions.
Pro Tip: Stand at your front door and look toward the street. If you see the bulb directly, the fixture is angled too high. Adjust until you see only the glow, not the source.
Solar pathway lights seem like an easy choice, but solar vs. low-voltage reliability is a real concern in Pittsburgh. Shorter winter days and frequent cloud cover mean solar fixtures often don't charge fully, leaving your path dark when you need it most. Low-voltage systems connected to your home's power are simply more dependable here.
For more ideas on how fixture style and placement contribute to overall curb appeal, browsing exterior illumination tips can spark useful ideas. You can also find hardscape lighting inspiration if you're thinking about extending your lighting beyond the path itself.
Troubleshooting and common mistakes to avoid
Even with a careful install, problems can arise. Here's how to spot and fix the most common pathway lighting issues.
The single most costly mistake is burying wires before testing. Once the wire is underground, finding a faulty connector or a miswired fixture means digging everything back up. Always run a full test with the system powered on and every fixture in place before you touch a shovel.
Here are the issues you're most likely to encounter:
- Flickering lights: Usually a loose connector or overloaded transformer. Check each snap connector and verify total wattage against transformer capacity.
- Dim lights at the far end of the run: Classic voltage drop. Upgrade wire gauge or switch to hub wiring.
- One fixture not lighting: Check the individual connector first, then test the bulb. Most LED pathway bulbs are replaceable.
- All lights out suddenly: Check the transformer's built-in circuit breaker. Many transformers trip when overloaded. Reset and reduce the load.
- Glare instead of glow: Fixtures are aimed too high or spaced too close. Reposition and reduce fixture count if needed.
The most overlooked installation errors include overlighting, poor placement that creates shadows instead of illumination, burying before testing, and using an undersized transformer. Avoiding these five mistakes puts you ahead of most DIY installs.
Solar fixtures deserve a specific mention here. In Pittsburgh, solar reliability concerns are real. A pathway that goes dark on a cloudy November evening defeats the entire purpose. Low-voltage wired systems give you consistent, predictable performance year-round.
For a broader look at what professionals watch out for, reviewing outdoor lighting mistakes covers both pathway-specific and whole-property pitfalls worth knowing before you finalize your design.
A professional perspective: What we've learned from Pittsburgh installs
After completing pathway lighting projects across Pittsburgh's neighborhoods, from the hillside lots of Mount Washington to the flat yards of the North Shore, a few truths stand out that most installation guides skip.
First, Pittsburgh's freeze-thaw cycle is brutal on cheap fixtures. We've seen plastic housings crack after a single winter, leaving exposed wiring and dead lights by March. Brass and copper fixtures cost more upfront but outlast plastic by years, often decades.
Second, voltage drop is far more common in older Pittsburgh homes than homeowners expect. Many of these properties have long walkways and aging electrical panels that weren't designed with landscape lighting in mind. Hub wiring and a quality multi-tap transformer solve most of these problems before they start.
Third, the instinct to add more fixtures usually works against the final result. Restraint creates drama. A well-placed fixture every 7 feet beats a crowded row of lights every 3 feet, every time.
Avoiding lighting mistakes pros see repeatedly often comes down to planning before purchasing, not the other way around. The homeowners who get the best results spend more time on paper than at the hardware store.
Bring your pathway vision to life with local expertise
Installing pathway lighting yourself is absolutely doable, but getting every detail right, from transformer sizing to fixture angles, takes time and patience. When you want results that look polished and last through Pittsburgh's toughest winters without the trial and error, working with a local professional makes the process genuinely stress-free.

At Myriad Lighting, we handle everything from initial design to final testing, with hidden wiring and zero disruption to your landscaping. Our landscape lighting experts know Pittsburgh's terrain, climate, and architecture, so your pathway lighting works beautifully from day one. Whether you have a simple front walk or a complex multi-zone property, we tailor every install to your home and your style. Reach out today to schedule a consultation and see what a professionally lit pathway can do for your home's safety and curb appeal.
Frequently asked questions
How do I size a transformer for pathway lighting?
Multiply your total fixture wattage by 1.25 to get the minimum transformer rating. Per transformer sizing guidelines, 12 to 14 gauge wire and a GFCI-protected outlet are also essential for a safe, reliable system.
What causes pathway lights to appear dim or flicker?
Dim or flickering lights almost always point to voltage drop. Long wire runs over 100 feet on 14 AWG wire, thin wire, or an overloaded transformer are the usual culprits. Upgrading to 12 AWG wire or switching to hub wiring typically resolves the issue.
Are solar pathway lights reliable in Pittsburgh?
Not consistently. Solar vs. low-voltage performance tips heavily toward wired systems in Pittsburgh, where cloudy skies and short winter days prevent solar fixtures from charging fully. A low-voltage wired system gives you dependable light every night.
What's the most common installation mistake homeowners make?
Burying wires before testing is the mistake that causes the most rework. Burying before testing means any wiring fault or connector issue requires digging up your entire run to find and fix the problem.
Recommended
- How to illuminate building exteriors for stunning curb appeal
- Top features of professional lighting design for Pittsburgh homes
- Motion-activated outdoor lighting: homeowner's guide
- How quality outdoor lighting enhances Pittsburgh homes
- Residential Paving: Homeowners Guide to Installation and Maintenance | Asphalt WorkX